Thursday, 15 March 2012

Crafty Crease #13: Cherish Journal Booklet Tutorial

The base booklet 

What you need:


       - a foolscap kraft manilla folder
       - scissors
Kraft Manilla Folder
       - double sided tape
       - bone folder


Step 1: Cut off the excess tab

Next, we create all the folds we will need....


  1.  Open folder
  2. Fold one page toward the middle fold
  3. Use a bone folder to get a good crease.  Do this for all folds.
  4. Fold the other page in half towards the middle
  5. Open...you should have 4 sections
  6. Now fold the page lengthways to make a middle crease.
  7. Fold one side toward the middle fold.
  8. Repeat on the other side.
  9. Open the page...you should have 16 sections.

Now you are going to make 3 long cuts.  

If you start your cuts with the shortest side of the page you will get a top binding booklet.  If you do it with the longest side you will get a side binding booklet.

In this case we are going to start with the longest side facing you.


1. Cut up the crease line through 3 sections.
2. Turn the page 180 degrees.   Cut up the middle crease line through 3 sections.
3. Turn the page 180 degrees again.   Cut up the third crease line through 3 sections.

Now we will fold the sections up to make the finished book...


  1. Start at the bottom left square.
  2. Push up to make a mountain fold
  3. Fold the "mountain" together and fold onto the third section..
  4. Tuck the other three sections already folded, under the fourth section.
  5. Now fold all four sections on top of the fifth section.
  6. Push all five sections towards you to make another mountain fold.
  7. When you get to the eight section, tuck the other 7 sections under it.
  8. Now fold all 8 sections to the right on top of the ninth section.  You are basically at the first picture again.  Follow numbers 1 to 6.
  9. Voila....you have a booklet!!

The last step requires taping folded pages together.  Do this carefully.  The folds change direction and can get confusing.  I use the extra tacky red tape to make sure it holds really well, but double sided tape or a good glue stick will do a good job.


The basic cherish journal, ready to be distressed and embellished!!


Wednesday, 14 March 2012

Farm Fare #7: New Blood

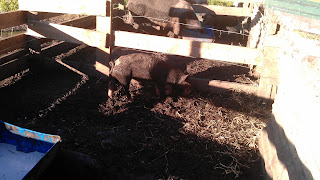
Vaughan wants to expand our big breed mix even further now.  So voila...we have a new sow.  She is  aa purebred Berkshire.  I have named her Rosie (Vaughan calls her Berkie) and its a bit of a struggle settling in.

Rosie is about 14 weeks old, and although she is bigger than the piglets - there are 18 of them!!  They are incredibly noisy and boisterous and roam as a pack!!  Besides that the other two sows don't seem to like her.  On the first night she was kicked out of the pens and Vaughan found her shivering in the mud - poor thing!  So in the dark and rain, V blocked off one pen for her.  The piglets could still visit but she was protected from the big pigs!  The next day she was roaming in the big pen with Rocky (which the piglets can't get to) and even slept with him in his dry hut.

She's obviously a bit shy still but she get used to us eventually.

Rosie at 14 weeks - on day 3 at Te Pahu farm

Farm Fare #6: Confused

The unmistakeable sounds of new chicks could be heard late Sunday evening (March 11th) and after a quick look yesterday morning, 4 little chicks could just be seen under the protective wings of their Barnevelder foster mother.

Much to our delight, all 12 eggs were hatched and mum ventured out with her little clutch.  This is the first time that we have had an 100% hatching rate.  Like all newborns, they are incredibly cute and so funny to watch.  They are so willing to learn and mimic their mothers actions.

Last night I fed bits of bread to the new mum as a treat for her relentless work.  A broody hen is quite magnificent.  Some mothers are fiercely protective (like our Light Sussex) while others like to give a bit of warning.  But they sit on those eggs day and night for 21-25 days, only venturing for a quick food stop and drink maybe once a day.

When I look at our mini chickens (born in January) I realize how quick they grow.  One of our mini chickens decided to test out his rooster voice the other day - sounded like a teenage boy when his voice is changing.

There's only one big problem......

9 of the cuties, seen here with their foster mum, are this distinctive dark colour .....and


3 of them are this honey colour with no distinctive stripes at all!!  Could they all be the same breed?  Does this mean we have 3 hens and 9 roosters???  Only time will tell I guess - keep your fingers crossed!


We are all a little confused I think.


Thursday, 8 March 2012

Crafty Crease #12: Cherish Journal

I really love making tags for journalling purposes, and I really love layering embellishments and such in a 3D manner.  However, this often causes conflict in a journal by making the journal difficult to close or use because of its 'bulk'.  I have wracked my brains trying to find ways to solve the problem. 
Box Casing: Front View

Box Casing: Side View
Eventually, I was inspired by something I saw - a ring binder that fits inside box casing.  

So here it is... The Cherish Journal.
 
I guess it's a bit like a gratitude journal - a place to write down things that you are thankful for or in this case, moments you cherish.


The box casing and the journal booklet
Booklet Cover: Background paper from Kaisercraft, stamps from Bo Bunny and Stampin Up.  Handmade flowers and black brads.  Spellbinder nesting die for background label.  Tim Holtz Sewing Alteration: Mini for dressmaker dummy.

The size of the booklet is about 11cm x 9cm and has a top binding rather than the traditional left binding.

When the booklet is opened, the embellished tag is on the top and the journal writing space is on the bottom.

Like most of my projects, the booklet is made from one foolscap kraft manilla folder.  It has 8 journalling pages with 10 embellished tags.  Here are photos of each tag.....

Page 1 Tag
Handmade flower, brad from the Warehouse, gold lace ribbon from a past pressie, metal filigree from beading shop, spellbinder nesting die cut held with two small brads (slit pins) and stamp from Tim Holtz visual artistry collection.  Background paper from Graphic 45
Page 2 Tag
Background papers from Kaisercraft, stamp from Tim Holtz components collection, Martha Stewart heart punch with stamp.
Page 3 Tag
Background paper from Graphic 45.  Tim Holtz sewing die (mini) for the cotton reel and dressmaker dummy.  Stamp from Papertreyink.com.   Spellbinder nesting die cut for labels.  Ribbon & buttons.
Page 4 Tag
Background papers from Kaisercraft, stamp from Tim Holtz components collection.  Can't remember where the die came from to cut this bird out.
Page 5 Tag
Background paper from My Minds Eye, Martha Stewart butterfly punch, don't remember where the stamp came from
Page 6 Tag
Background paper from My Minds Eye.  
Martha Stewart butterfly punch, stamp from Tim Holtz components collection and  Spellbinder nesting die cut for labels.  Brass split pin.  Stamp from Stampin Up.
Page 7 Tag
Branch & leaves from Tim Holtz Autumn Gatherings die, bird from Tim Holtz Caged bird die, stamp from Kaisercraft, background paper from My Minds Eye 
Page 8 Tag
Handmade flower, brad from Stampin Up, metal filigree from beading shop, spellbinder nesting die for label, stamp from Tim Holtz,  Martha Stewart butterfly punch, background paper from Graphic 45.

Full page overview


This is what you see when you open the booklet.  I used a stamp to provide some lines to write on but left as much space as possible to give the writer more freedom.


Back cover of booklet


Next Week: 
  • Tutorial for making the base booklet
  • Tutorial for making handmade roses
  • Silhouette Cameo Preview 


Wednesday, 7 March 2012

Crafty Crease #11: Altered Photo Frame


Photo Frame to Post It Holder

 I bet every household has at least one of these old photo frames - they were the big thing a couple of decades ago and really cheap to acquire.

Although they may not be the big thing now, these frames can be quickly, cheaply and easily altered to make a Post It holder.


What you will need:
  • Old plastic photo frame (6' x 4')
  • Post it pad (3'x3')
  • 10.2 x 15.2 cm piece of patterned paper
  • 35cm co ordinating ribbon
  • 2' scalloped circle (cardstock)
  • 1.5' circle (cardstock)
  • Double sided tape


Step 1
Slide in patterned paper and use double sided tape to stick the Post it Pad to the the front as shown above.


Step 2
Organise your embellishments.  I used a 2' scallop punch to cut out several circles and the same to the 1.5' circles.  

Cut about 35cm lengths
I used a note type stamp in the middle of the 1.5' circles. I got these stamps shipped from USA.  I really love Papertreyink.com - it was expensive but worth it.

I get these ribbon rolls from the $2 shop.  They are cheap and come in a variety of colours.


Step 3
Place a strip of double sided tape across the edge of the back flap.
Make sure you have enough tape to fold around to the front.  This gives the holder more
stability.


Step 4
Use the tape as a guide when putting on the ribbon and tie your bow to one side (I usually tie on the right hand side).  Knot twice.  Cut the ends on the same slant.

Step 5
Using extra tacky tape, put 2-3 strips on the back of the circle embellishment and stick firmly to the frame.

Step 6
To ensure that the ribbon doesn't fray, you could use a flame to melt the edges.  Be careful.  Inch your way towards the flame slowly.  When you are close enough you will see the ribbon sort of 'repel' away from the flame - thats when you know its sealing.  This is something you probably want to practice first!


And there you have it ....a really great Post It holder.  Great for yourself or as a gift.


Other completed examples